A microsite can be a powerful hook to engage a niche audience. But how do you build an effective one that drives the right audience to the shiny new site that complements your main website? We’ll walk you through the essential preplanning steps for building a microsite and provide guidance on the process of actually building one for your project.
Four essential components for creating a microsite
What makes an effective microsite? Below we’ll look at some of the key characteristics to keep you on track when you create a microsite.
Separate website domain
It’s typical for microsites to use a distinct domain name separate from their parent website. This practice establishes a clear separation between the microsite and the main website. Visitors should be able to recognize that the microsite isn’t entirely unrelated to the main website but rather serves as an extension of the brand’s online presence.
Call-to-action buttons
Similar to how you would implement a call to action on your main website, microsites should consistently direct users to take specific actions. These actions could include signing up to support a nonprofit organization, watching an educational video hosted on the microsite, or redirecting the visitor to the main website. A call to action serves to make the microsite’s purpose abundantly clear.
Targeted at a specific audience
As microsites are typically designed around a single initiative, they provide you the opportunity to narrow down your audience and target an extremely specific group that may not be feasible on your primary website.
By segmenting your audience for a microsite, you can concentrate on crafting tailored messaging that effectively appeals to the intended audience, increasing the likelihood of higher conversions.
Simple to navigate
User-friendly sites keep the bounce rates at bay. Visitors should be able to navigate a website smoothly, without encountering any obstacles—and with a clear understanding of how to explore it. Ensuring that the microsite’s layout is easy to scroll and straightforward enables visitors to concentrate on the messaging without distractions.
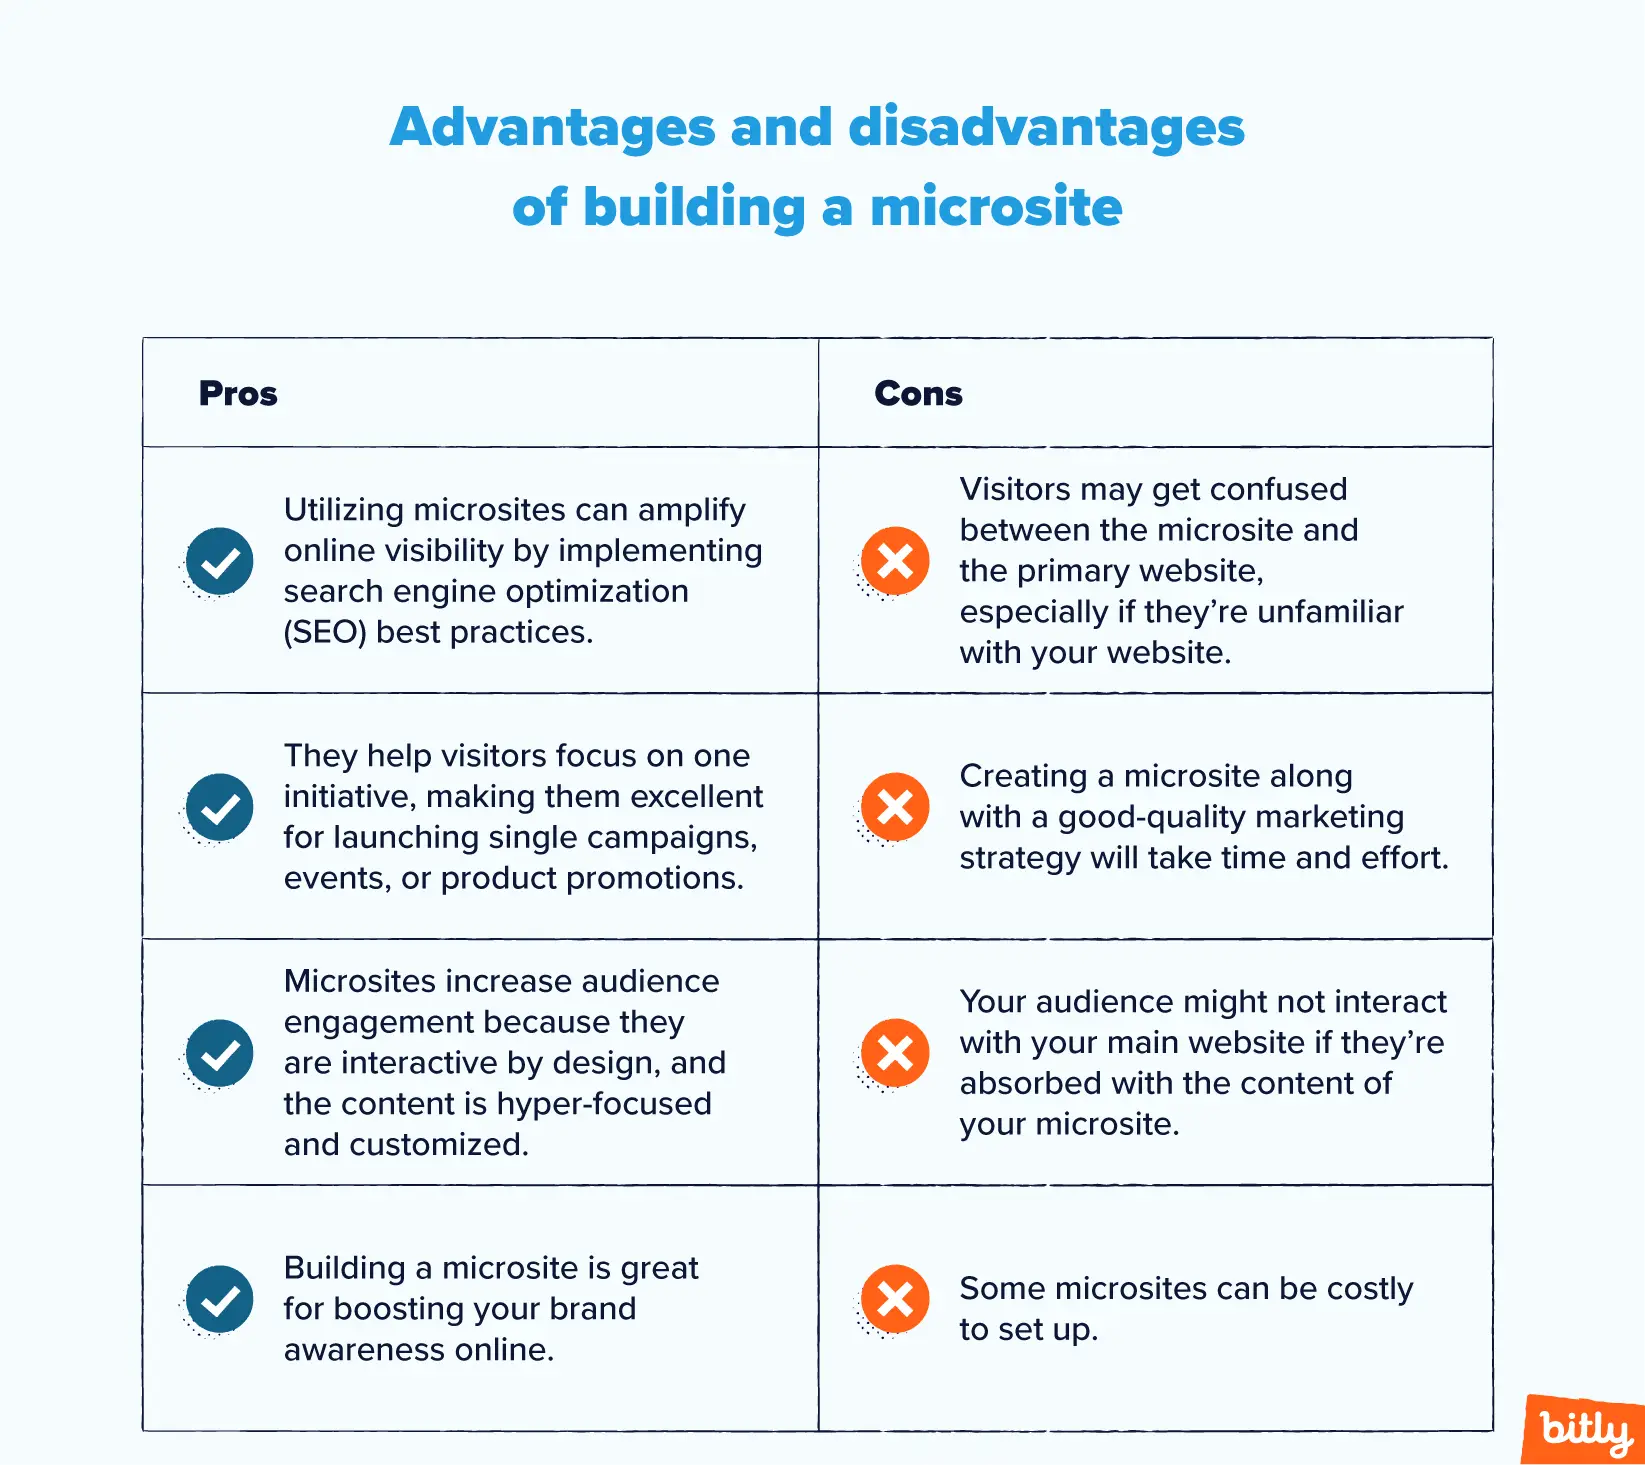
Advantages and disadvantages of building a microsite
Can’t decide if you should create a microsite? We’ve weighed the pros and cons to make the decision process as easy as possible.
What is an example of a microsite?
Both of the microsites below illustrate two different ways of building a microsite, either with a link-in-bio or through a microsite building agency.
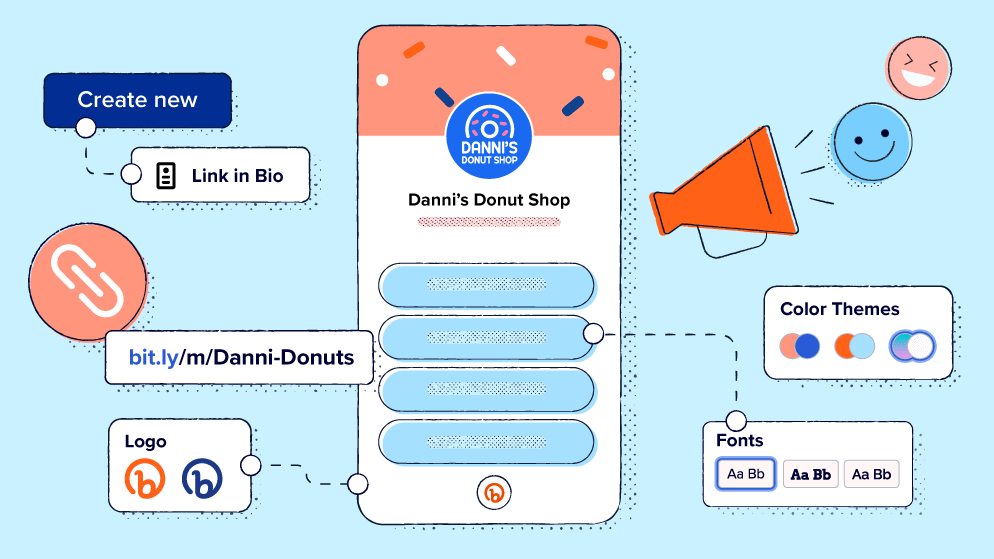
Danni’s Donut Shop
Danni’s Donut Shop, a fictional small business, just rolled out their microsite using Bitly Link-in-bio! Their aim was to boost their online presence by using their social media bio to steer their current customers and followers toward more of their online content.
They deliberately picked which social media sites they wanted their followers to check out, along with a few links highlighting important services.
The microsite’s design was clean and simple. It prominently displayed their brand logo, featuring a donut, and used their signature pink and blue colors. Social media icons were right there for easy access to their profiles, and buttons directed users to their most important content.
When building a microsite using a link-in-bio approach, you have the flexibility to select which social media platforms and links to showcase. Your choices should align with the content you wish to highlight and the specific audience you aim to engage.
Pro tip: Make sure to incorporate a Bitly Link-in-bio on your most active social media profiles, whether it’s TikTok, Instagram, Pinterest, or any other platform of your choice.

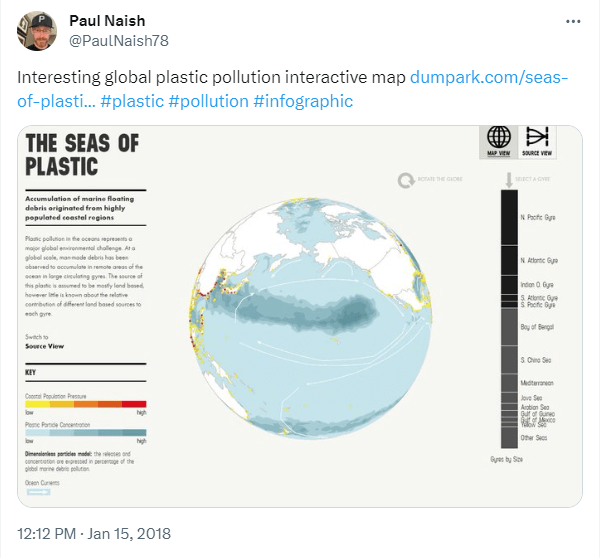
The seas of plastic
Dumpark designed an interactive microsite highlighting the existential threat of plastic pollution in our oceans around the world. The message is poignantly illustrated through an infographic that features a depiction of the Earth’s globe. Visitors can interact with the globe model, rotating it 360 degrees to gain insights into the extent of plastic debris on a global scale.
On the same microsite, visitors can click on “source view” to delve into the journey of plastic waste from coastal areas into ocean gyres. This information is complemented by a model that serves as a visual aid, illustrating the connection between coastal populations and ocean gyres.
Scrolling down to the bottom of the page, visitors can access more in-depth information on this educational topic by clicking on a link that directs them to the corresponding scientific article. They also have the option to share the infographic on social media if they choose.
This is an example of how brands can zoom in on a single topic with a microsite, capturing the attention of a very specific audience. When you look at what this site is all about, it’s clear that it might not appeal to everyone. This is where a microsite truly excels; it allows you to tailor your message to reach the right audience.
There’s no shortage of microsites but if you’re looking for 12 diverse types of microsite examples, head to our blog!
Preplanning before you create a microsite
Let’s talk strategy. You didn’t think we were just going to dive right into building a microsite without a game plan, did you? To launch a microsite, you’ll need a plan that serves as the blueprint to bring your grand vision for the microsite to life.
Get clear about your why
Why do you want to launch a microsite? Do you have a project you want to highlight, an event to launch, or a product to promote? Do you have an initiative that needs special attention? Try not to gloss over this step so you can get a clear idea about the purpose of your microsite.
Develop your content strategy
Producing relevant content without a content strategy is like setting off on a road trip without a map. This analogy holds true for both websites and microsites. Developing a content strategy for your microsite helps you keep your content firmly aligned with your microsite’s goals.
Design features
Aesthetic matters when building a microsite. It’s what grabs users’ attention right off the bat. Things like layout, scrolling features, visuals, font choices, and colors can help steer visitors to the important parts of your microsite. Take the Seas of Plastic microsite, for example; they use a visually striking rotating globe to help their audience understand the content on their microsite.
What audience do you want to target?
The type of audience you want to reach should shape both the content and design of your microsite. Creating a buyer persona will give you insights into the audience you’re aiming for. With this understanding, you can tailor your content and messaging to match what you know will connect with your target audience.
Branding elements
Even though a microsite has its own unique identity compared to your main website, it’s still a part of your brand. This means that staying consistent with your brand is essential. A well-branded microsite should follow your company’s brand guidelines consistently, ensuring that your brand remains cohesive across every channel—after all, this is branding 101.
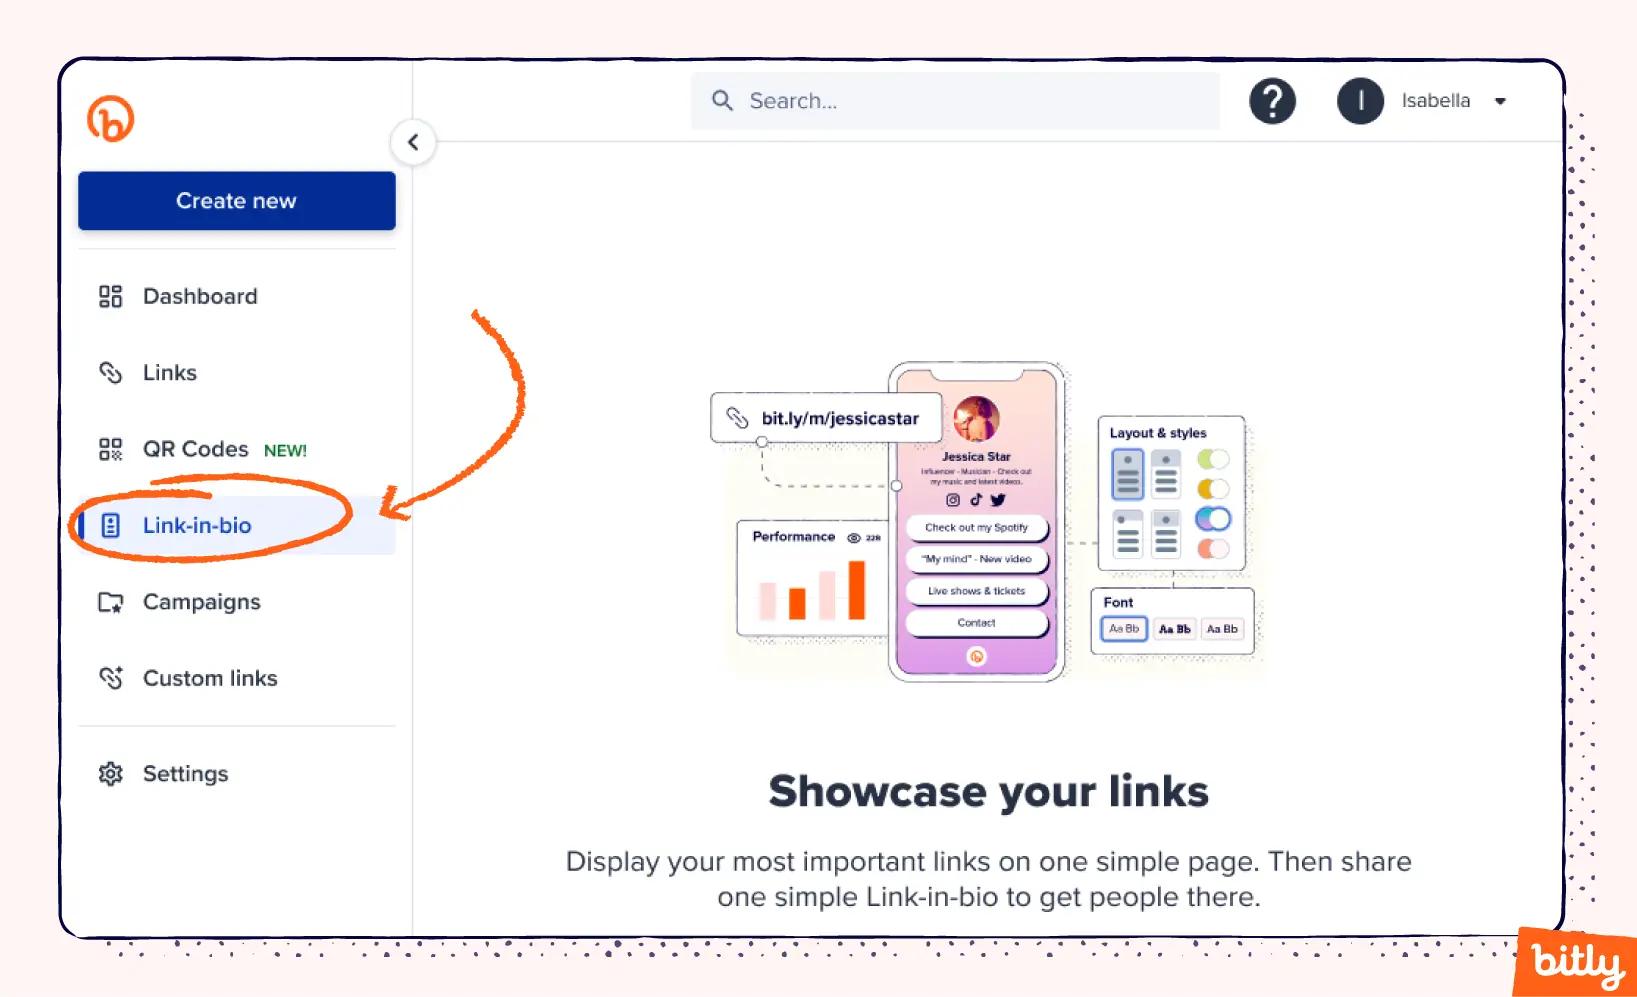
How to create a microsite
While there are a variety of micro-website platforms out there, we consider ourselves experts in one particular kind: the Link-In-bio. Follow the steps below to create a microsite with our platform.
1. Take some time to reflect on the purpose and goals of your Link-in-bio. What would you like to achieve?
2. Once you have a clear goal in mind, sign up or log into your Bitly account.
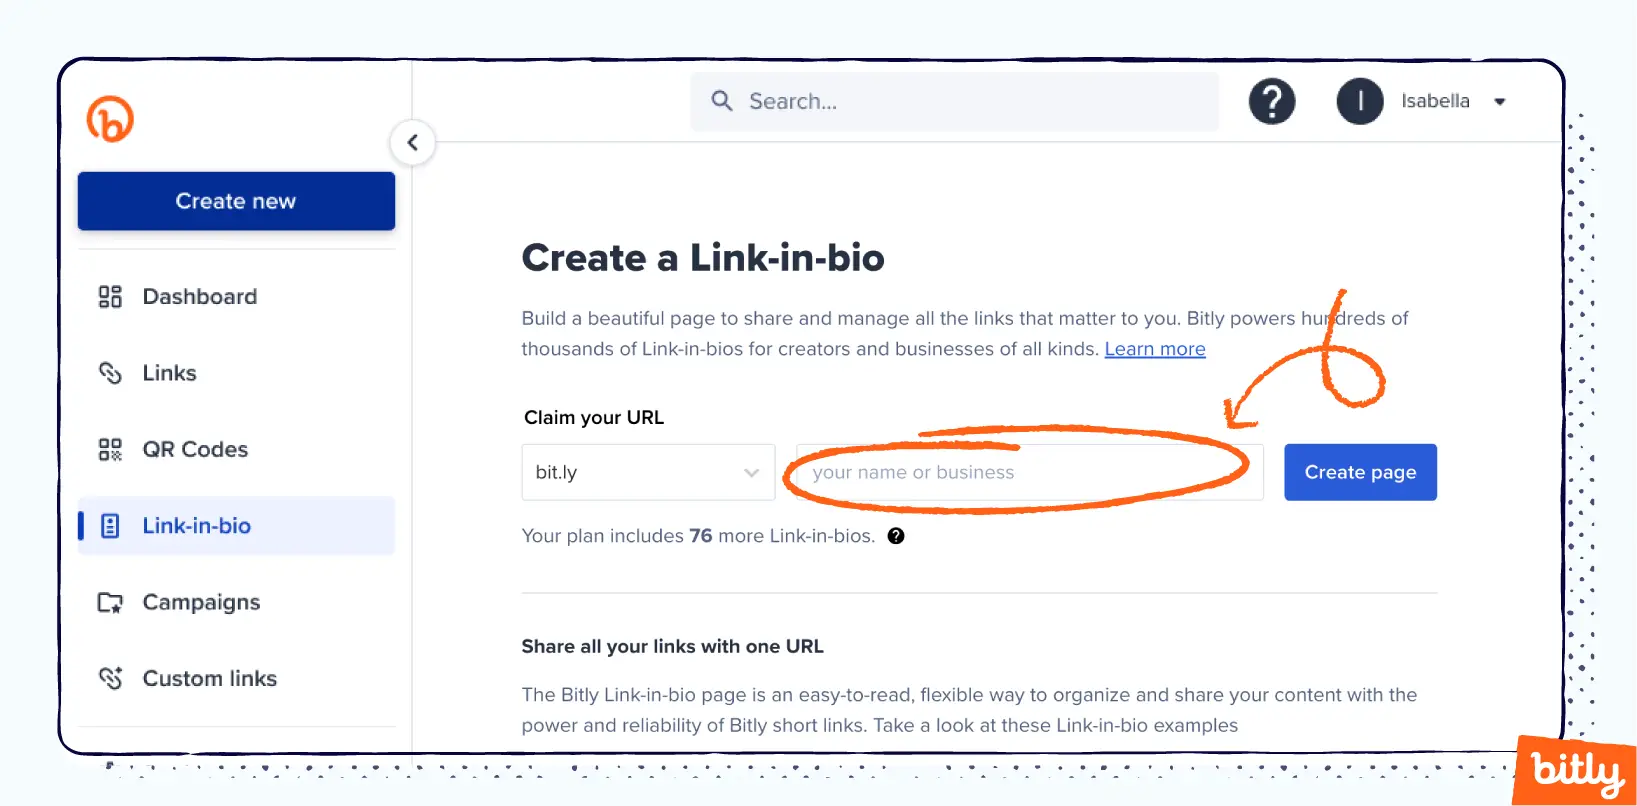
3. On the left sidebar, under the blue Create new button, select Link-in-bio.
4. Claim your Link-in-bio and type in your name or business in the open field.
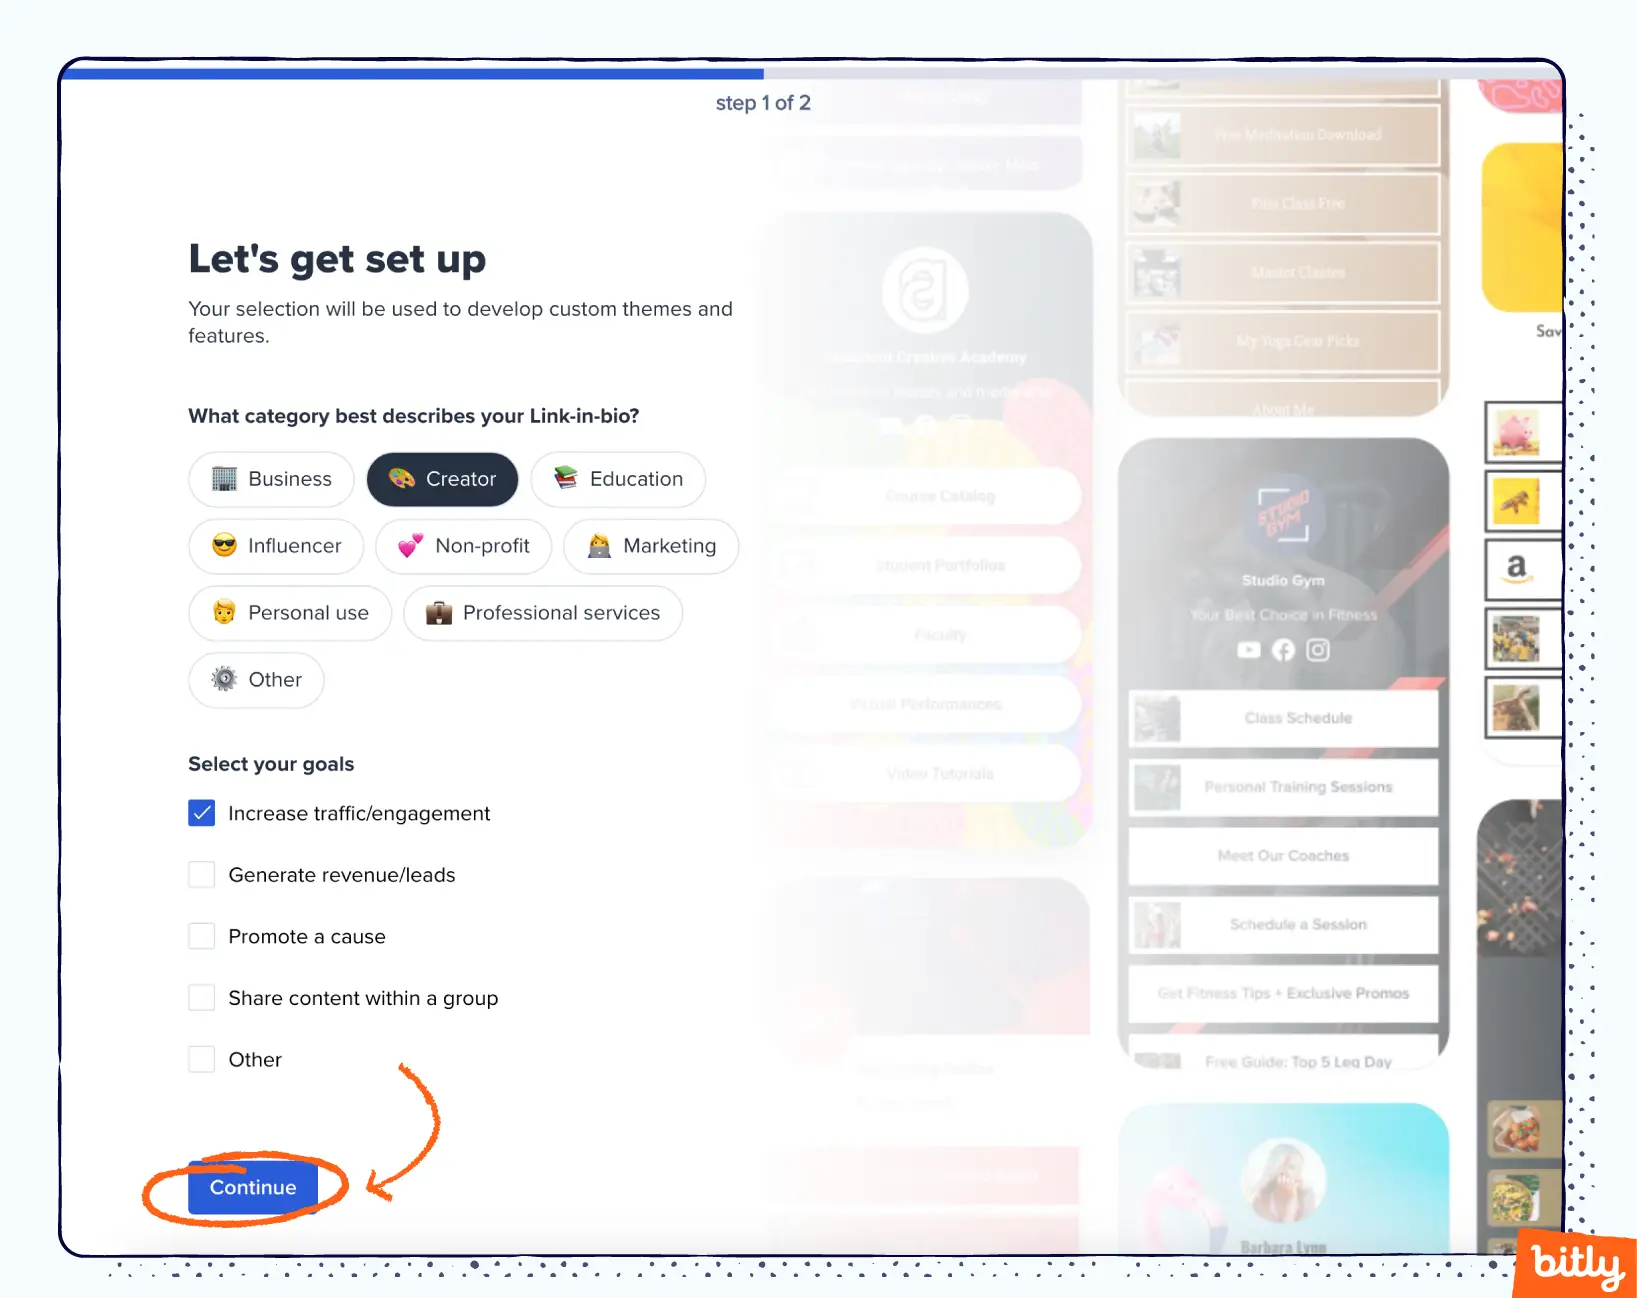
5. Select the category that best describes your Link-in-bio and your goals. Select Continue once you’re done.
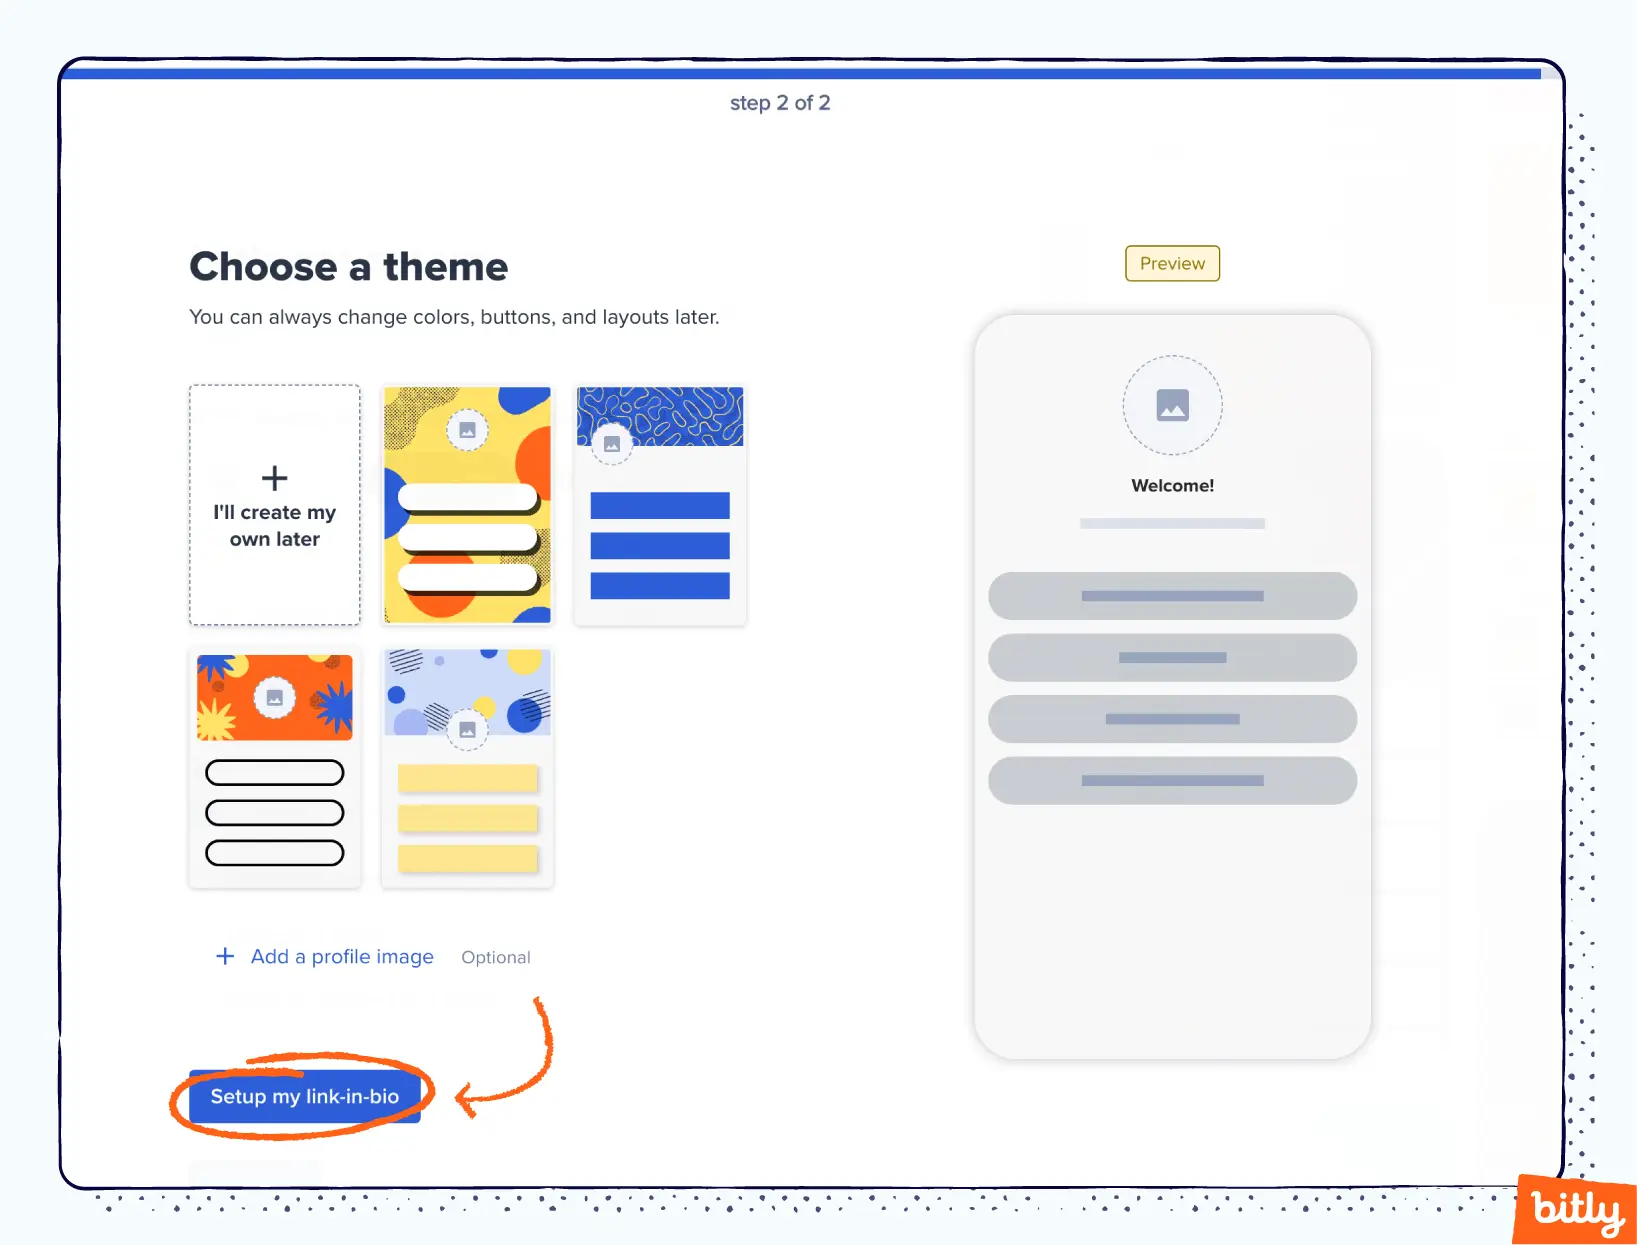
6. Choose the theme that aligns with your brand assets or, if you prefer, come back to it later. Select Setup my link-in-bio once you’ve completed this step.
7. Now for the fun part: Add your links and social icons, and customize it.
8. Select the Publish changes in the right-hand corner.
9. Find your link and select Copy. Then, add your Bitly Link-in-bio to your social profiles!
Curious about how to add our microsite to your social media accounts? Find out how in our Bitly link Instagram bio and how to add link in TikTok bio articles.
Create a microsite code-free with Bitly Link-in-bio
Bitly Link-in-Bio makes building microsites simple, fun, and convenient. Give your social media profile a major glow-up and spotlight the links and social media sites that matter the most to you. With our platform’s simple-to-set-up and ingenious customization features, you’ll learn how to create a microsite in a matter of minutes—all while keeping your brand personality intact! Bonus? Track every click and watch your audience engagement grow over time.
Get started with a free account and start forging deeper connections with your audience today!


